A very cakey road trip – Surprise Halo 30th Birthday Cake!

Howdy!

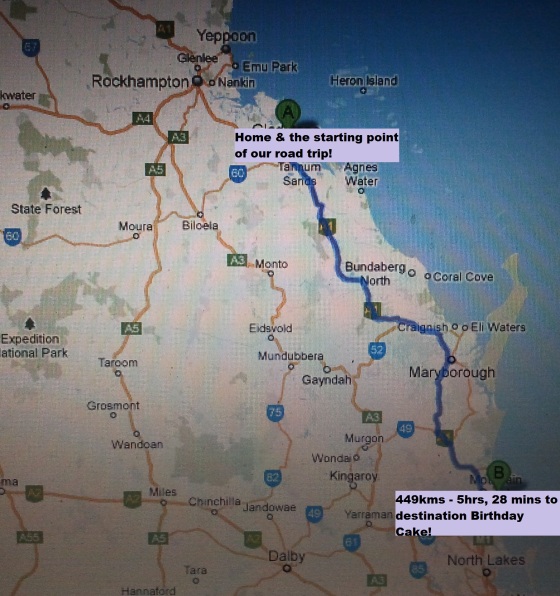
So a few weeks ago, I went on a little holiday to help celebrate a good friends surprise 30th. The birthday boy is my partner’s best friend and co-conspirator in mischief. He is the head chef of a gorgeous little boutique place on the Sunshine Coast, and I was very privileged to work with him a few years ago, along with my partner to create his wedding cake (by far the best cake project I have ever been a part of – and in fact the pic on my blog heading). It was so exciting to be part of a surprise birthday celebration, and of course, I really wanted to make a special cake for him as well! There was just one particular challenge with this cake that I have not had to tackle before.  This cake had to travel.  We live 450 kms away! So how the heck was I going to show up with a cake? Excuse the dodgy pic - Road trip map!Fortunately for me (or unfortunately… it remains to be seen) I will be doing a wedding cake in a few weeks, which has to travel a further distance. So I took this as the perfect opportunity to trial run cake transporting, and get my head around the logistics involved.
This is how I planned the cake:

  • 2 weeks before – make up the modeling paste decorations.
  • 2 days before – bake chocolate mud cake, wrap & refrigerate to set for journey.
  • 1 day before – whip up batch of vanilla bean buttercream & refrigerate for the journey.
  • Night before – pack up colours, tips, piping bag & couplings, edible glitter, pallet knife & other essential decorating paraphernalia.
  • Day of travel – Prep esky with ice, seal off & stack cake & frosting in to keep cool during trip.
  • The trip – super fun drive down the coast listening to great music & stopping at cool places. (If you can’t tell, I love road trips 😉 )
  • Arrival at destination – Quick cake assemble!

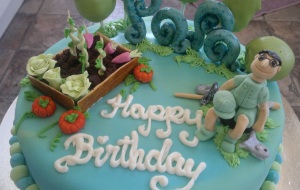
The finished product! Not too bad for a travelling cake! 😉

And that’s pretty much how it all panned out. 😀 Of course I picked a pretty simple design, in order to keep the stress levels down. Just a quick plain cover of the cake in frosting, with a shell border.  I made up the 30 in white modeling paste and once dried, painted it with a nice thick paintbrush. I kept the paint job on it rough & alternated colours of dark green, purple, brown & silver for a sort of camo feel.

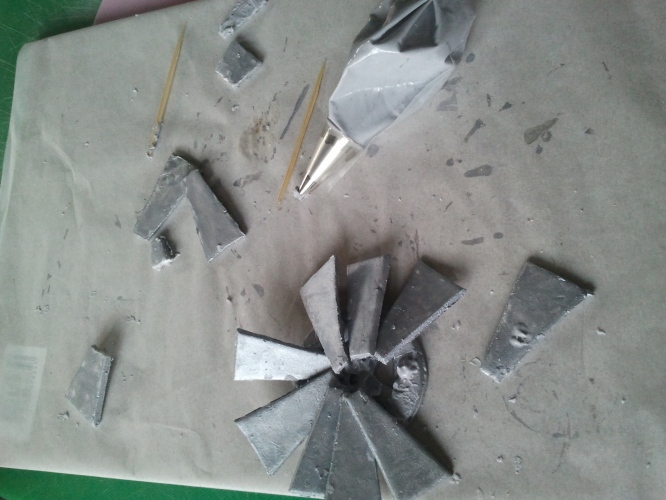
Painted Modeling Paste 30

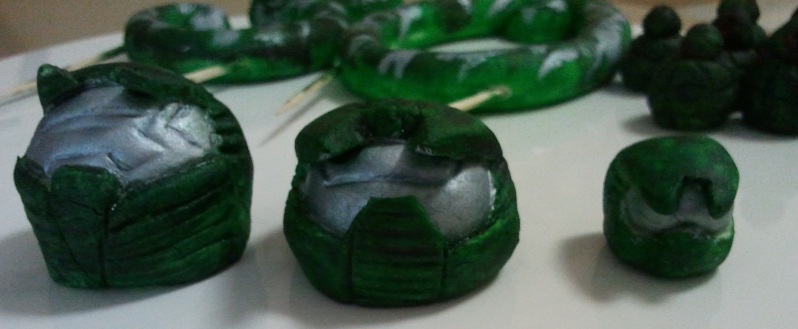
The other decorations for the cake were a pile of grenades & a Halo helmet , which I also made out of white modeling paste & painted.  I had a few goes at the helmet, which ended up being harder to make than I thought.  I just couldn’t get the shape right.  In the end, I took all  of my trial pieces with me, so that I could make a decision on what looked good on the day.

The helmets… see how I couldn’t get them right? >_<

My assortment of grenades… don’t look too closely… they are all different! 😦

Overall, I was happy with the cake… but only just. Its just that the decorations weren’t as good as I wanted them to be.  I felt like I was a little out of my depth with the helmet and grenades. I have only watched the boys play Halo in passing, so I had to get my shapes and ideas off the game, it’s manual & some figurines that we had.  Maybe I would have done a better job of it if I had done the hard yards and invested a few hours in game play? 😉

 Ummm…. Some how I don’t think I will be playing games in future to improve my caking skills, no matter which way I try and justify it.  But this was a great experience in something out of the ordinary for me. Practice, practice, practice! 😀 (Its becoming my mantra this year).

Oh, and one last thing before I go… This cake was the lush chocolate mudcake that I have been making a lot of this year. It is super rich, very adult and… I will be sharing the recipe just as soon as I get a few moments to type it up.  Will post it very soon! 🙂

Until next time, thanks for dropping by!

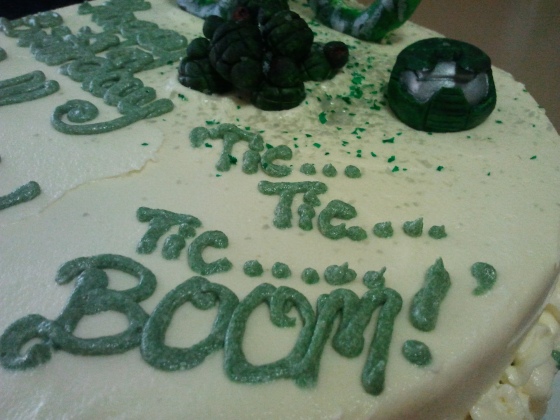
 Tic, Tic, Tic…. Boom! – That’s the noise you hear when your playing against the birthday boy… when a grenade drops out of nowhere & gets you! 😛

Craft Swap – With a cupcakey twist!

Hiya! This is a “kinda” cake related post – part cake, part craft. 😀

I am a member of the “Sew Good –  Group for lovers of sewing and all things crafty” on facebook, which has just run its very first members craft swap. I have never participated in anything like this before, and I have never physically met any of the other members. They are such a lovely & knowledgeable bunch of ladies, and the idea of making something crafty for a stranger sounded like so much fun, so I decided to sign up for it! The time frame was a month – which seemed like ages, but wouldn’t you know it, the time flew… and what I thought would be easy, I actually found really hard – trying to make something for someone I didn’t know! I really wanted to make something that my swap partner would like, but I have spent the last few weeks completely stumped! Even with a short email of personal likes – which I found that my partner loved roses, rockabilly & pin-up – I was still drawing a blank. With a week to go, panic started setting in…. So I did some major brainstorming, and surprise surprise – I had a cakey flash of inspiration. 😛

The Kitch’n Vixen Cupcake Kit! – By Miss Cat

The Kitch'n Vixen Cupcake Kit! - My last minute craft brainstorm :D

The Kitch'n Vixen Cupcake Kit! - My last minute craft brainstorm 😀

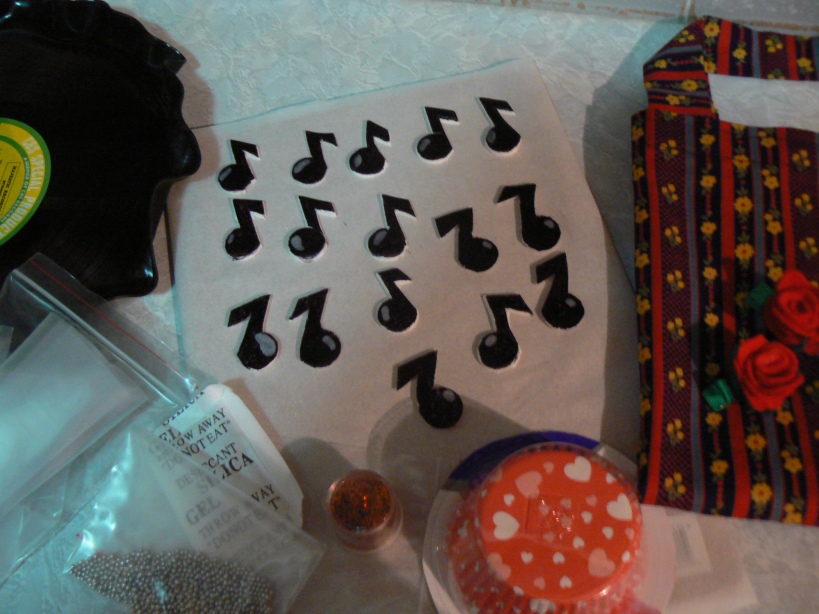
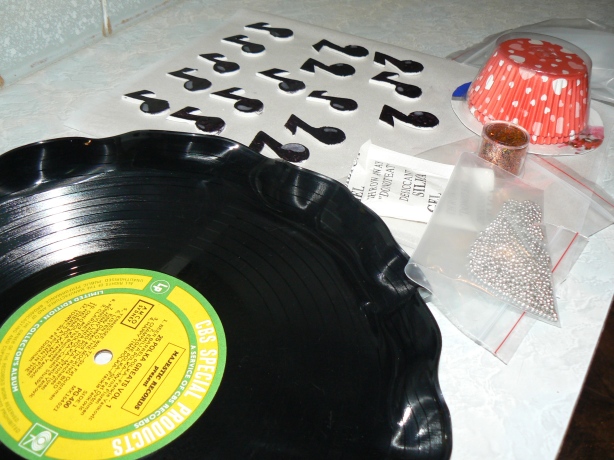
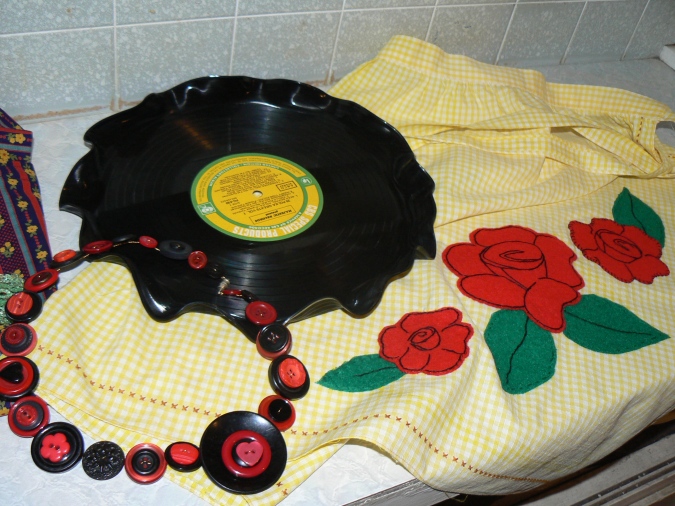
So this is what I came up with – a cute rockabilly themed cupcake kit! I designed this gift box to have a little something to “decorate” the hostess – a yellow gingham apron with appliqué roses, a button necklace, simple bag & some hairclips (which fitted with the crafting brief), AND packed up a handmade retro record platter, and all the fixins for some simple rock n roll cupcakes. I made up some chunky black music notes with modelling paste & painted them with a little silver to give them a little more detail & shimmer. I also packed up a disposable piping bag, cupcake wrappers & some edible glitter so all that needs to be added is a Betty Crocker cupcake kit. Put together these cupcakes look absolutely adorable! I have made them before for our local rock & roll dances, and the simple little music note cupcakes displayed on the vinyl records are just too sweet!

Chunky Music Notes ~ Putting together the DIY cupcake kit to send.

Chunky Music Notes ~ Putting together the DIY cupcake kit to send.

I hope I didn’t go too off base with my idea, and I really hope that my partner is surprised and happy with her swap. It’s the thought that counts after all! Today was the finish date, so I have sent this little box of fun off in the mail. I really hope she likes it! Once all the swaps are received, we are to take a pic & post it for the group to see. I can’t wait to see what else everyone made!

Rockin Serving Platter - perfect for cupcakes & a pretty apron for beautiful baking!

It’s been so much fun getting involved in this group! Has anyone else participated in a craft swap or something like this? If you did, what did you do, & how did you find the experience? It makes me wonder if there is a cake or sweets group on facebook that I could join. Hmmm… something to ponder.

Anyway, now that I have finished off this little project I think I will take the night off and celebrate… glass of wine anyone? 😉 Have a nice night!

Until next time…. Thanks so much for stopping by!

Packed up and posted! 😀

Holidays & Cakey Travel!

Howdy!!

Well I have been pretty quiet on the blog front, feels like I have been away for ages! But I have been literally here, there & everywhere lately. I’ve been completely unable to sit at my laptop for more that a second! So much has been going on, and all my well meant plans to put up a few posts have gone right out the window. 😦

So for a quick catch up of the last few weeks…. Firstly, I hope everyone had a wonderful Valentines day! I love the special little celebration days through the year, and try to celebrate all of them. I guess I treat them as some of the extra spice in life! 😉  Usually I enjoy using Valentines day as an excuse to plan something special for my beau, but this year it took a back seat to an out-of-town trip that was a gift to us both.

Some trip pics!

Over the last week I have been on the most fun holiday! A very special friend of ours turned 30 and his gorgeous wife decided to surprise him by organising a group trip to Dreamworld on the Gold Coast!  It was such a wonderful trip, getting to see some of the people we love, and wish we lived closer too. And of course being a birthday, I really wanted to make a cake as well! Which posed the challenge, how to make a cake that travels! – This will get its own post!

Also while away, I found the cutest little chocolates! Do you find that when you are out and about doing things not even remotely related to cakes, you find thing that inspire new cake ideas? I know I do! Cake on my mind… all the time! 😛

Delightful Freckleberry Chocolate numbers! Wouldn't these be a super cute cake topper? They certainly made me smile! 😀

Can’t you just see these on a cake? A gorgeous chocolate cake with choc frosting and freckles all over the trims?  Ohh… or a lush red velvet cake with choc marbled ganache!  I checked out the fab Freckleberry website and they also do letters!  I will definitely be daydreaming about a cute creation just for the excuse to use these.

Also squished into the craziness of holidays was a fluffy happy cake that I made with my mum.

Mums Chiffon Cake & Soft Meringue Frosting

The photos don’t show up the lovely sky blue base colour. This cake was also for a surprise party. Must have been a good week for surprises!  I helped out with some modeling paste numbers and cute little silver stars on wire, and we finished the cake with some cheerful balloons which matched the decorations for the party.  Apparently the birthday boy was thrilled with his party, and wrapped with the cake! – As were all the guest!

A cheerful surprise for Rodney's 60th!

Anyways now I’m back – it’s a harsh reality getting back to work, and frantically catching up on the teetering piles of jobs that have amassed in my absence. I’m rambling a bit now and its dinner time, so I will call it a night. The nice thing is once I’m back to being on top of things, I will post far more regularly.

Hope your having a lovely night and thanks for dropping by! 🙂

A special birthday cake for my dad!

Howdy! Its been a busy week, but I really wanted to find a moment to share this cake.  A little bit ago it was my dads birthday. Now, usually in our family we just do a very basic cake, nothing fancy. Seems we save the big decorations for other people. But since this year I’m trying to learn more, I took the opportunity to try and make something a bit special.

A special birthday cake for my Papa. 🙂

The greatest things in life that my dad loves are his garden, going fishing & his family. I can’t remember a time when he didn’t have fresh vegetables growing in the modest size backyard of my family home.  It is filled with fruit trees, herbs & vegetable patches, making every inch of dirt productive. When he isn’t tinkering in the garden, he loves to go fishing.  He was born in a little fishing village in Sicily, so it will always be a part of his blood. As a child, I remember my brother and I racing to the kitchen to crowd him when he would get home from a day out, to see what he had caught for dinner! If you can’t tell, my dad is very special to me! 😉

So to decorate this cake I wanted to try and make a few of the things that he loves.  It was a toss up… a garden cake, or a fishing cake?

My kind of garden!

Well I just couldn’t decide, so I went with a little bit of both!

Cute little vege patch ~ complete with pumpkins, lettuce, beans & beetroots.

So this is my little garden.  Choc crumble soil, and gum paste vegetables. I generally love things in miniature anyway, so making tiny little lettuces & pumpkins was a hoot! Each little piece made me giggle and smile.  If I had a little more time, I would have done a few things differently, made tomatoes instead of beans… dusted the lettuce with purple around the edges. But over all I was really happy with the way it came out. My absolute favorite part of the garden was the little wooden plank edge. I just rolled out some light brown sugar paste, cut out my planks, then textured them up with a coconut print. After they had dried, I painted over the texture with dark brown coloring to give a stained wood finish. Funny how you can be completely rapt and happy with such a small detail.

Sugar paste model kinda like my dad.. with a little fishy!

Unfortunately I didn’t get a good pic of the fishing rod & the little fish that I made.  Behind the figurine is a gum paste fishing rod.. a simple stick with a round reel, which I added detail to with a black decorating pen.  And I made a stack of little multi-coloured fish, which were super simple, and brushed with silver to finish them off.

To frame the back of the cake, I used simple green chocolate mud cakepops for trees… and the blue curly things… well, that’s ment to say “Papa”. Bit of a fail there. I guess this is what happens when I don’t get a precise look of the font down on paper first. Instead I just thought I would work it out as I went along. Not the greatest idea because as I was struggling to make something that looked like a P… the paste was drying… giving me a cracked finish. To try to fix my messy lettering I glazed them and sprinkled green and blue glitter over them. It created a cool looking background. But most of the family thought it was ment to be snails?? Then an “Ohhh, I see it now!” moment 😛 Well, combined with the trees and the rest of the decs, I still liked them!

And lastly I made a little sugar model of my dad… kind of. This is the 3rd figurine I have attempted. Lots of room for improvement here. But each time I try, it does get a bit easier and less daunting.

The big things I’m disappointed with on this cake are the fondant cover and the writing.  I tried to create a marbled effect with the fondant, using green and blue. What I wanted to achieve was a really distinctive swirly pattern over the whole cake as a base, bringing together the garden/fishing concept. But I over worked the colours and ended up blending it to an aqua colour. The swirls were still there, but very subtle.  And the writing… well I just ran out of time, and piped it on as quickly as possible. I wish I had just taken a moment to stop, take a breath & concentrate. But this cake was finished a minute before we walked out the door, so I smashed on the writing and off we went to lunch.

Overall, I’m so happy with the way this cake turned out. And most importantly, my dad was absolutely wrapped when he saw it. He could not believe it, and the look on his face was worth more to me than the price of any elaborate special occasion cake. His only criticism  was that I should have made the figurine look younger 😛

Well, that’s enough of my babble for now. Hope your all having a lovely weekend! Thanks for stopping by 😀

My Great Aussie Gingerbread Bar!

A breakdown of my first ever gingerbread house bar! 😀

Its a beautiful rainy weekend, so I thought I would take this opportunity to post a bit of a breakdown of the bar from my Australia Day post.

My ideas for the bar... yep, I have really limited sketching skills ! 😉

When I’m putting together something that I haven’t done before, I always try and get my ideas onto paper.  My sketches are pretty crude, but by scribbling it down, I get all my ideas out & start to work out the individual aspects of the project.  I try and put as much detail into my plans as possible, even though it may not be physically possible to achieve the things I imagine.  I won’t post pics of these cringe worthy sketches generally, but for this project I was doing something completely new to me, so I wanted to show what I was thinking, and how close I got to creating it.

Instead of making a cake or cupcakes this year, I thought I would do something a bit different. I took this opportunity to work with gingerbread for the first time. Knowing my own limitations, I decided on a basic design for the structure, and took a general gingerbread house template, adjusting it to suit an outdoor bar shape.

The basic bar on the board, starting to get decorated....

In hindsight I stuffed up the thickness of the gingerbread. It was a bit too thick and bulky, so the finish wasn’t as nice as I wanted. In saying that, it was super easy to work with. I got it all stuck together with royal icing without any dramas. Once it had dried, I melted some dark chocolate and painted the walls, trying to give it the texture and look of very rough wood. The roof I covered with a thin layer of grey royal icing, which I then scrapped off with a little zester, creating great tin roof looking ridges. Once that had dried I roughly painted over the top of the ridges with silver paint, to finish.

A side view of the bar, with the completed windmill... mounted on a pin so that I could spin it (very very gently), YAY!

There was a week spent  making decorations out of gum paste to bring this together. I previously posted the frustration of trying to create a windmill. I also made up some little crabs,  a water tank, some bunting for the sides of the roof, a radio (necessary for listening to the hottest 100), the bartender & his dog, and some other little bits and pieces to bring it together.

Rusty the cattle dog!

To cover the cake board, I really wanted to get a red dirt look.  Its one of those spectacular things about the outback, although I have to admit, the most I have seen it is in Childers. Its such a gorgeous colour! To replicate this I covered the board in fondant coloured with red & purple to a really dark hue. I then dusted the whole board with cocoa powder & crumbled some extra gingerbread over it.

With the bar done & the board ready, it was just time for assembly. 😀

Bazza the bartender welcomes you to the outdoor bar!

This was a  wonderfully challenging project. With heaps of little things to make that were all new to me, and fiddly in there own right. I had so much fun figuring out the little pieces. And in the end, I was pretty happy with the result. I wonder what kind of theme I can use for my next gingerbread creation? But that’s enough of my rambling for now.

 Thanks for stopping by, I’m off to pick mangos in the rain ~ fun, fun!! Hope your enjoying your weekend too!

A view from the back of the bar.

Happy Australia Day – Hottest 100!!

Just a quick post to celebrate Australia Day! In our home celebrating means tuning into Triple J and listening to the Hottest 100. Its been a great day, listening to some awesome tunes, and working on something special just for today. Instead of an Australia Day Cake, I thought I would do something a little different. Here are a few pictures of my Great Aussie Ginger Bread Bar! Its been a huge day and I’m just about ready for bed. Here are a few pics of the bar. I will go into a bit more detail in another post. 🙂

Aussie Ginger Bread Bar

Not what I had in mind….

Just a short frustrated post… Here is a  pic of what happens when I have an idea of what I want to make in my mind, which does not translate to what I’m realistically able to create.

This is not the windmill in my mind... 😦

What I am trying to do is make an aussie windmill for a little project (will post more on that later).  I thought I had worked out how to make it. I had sketched out my idea, and broken it down into smaller steps. But this is one of those times that I just don’t know enough to achieve what I want.

The first stages were so promising!

Suffice to say, it has been a frustrating afternoon. But this is the point of practicing & trying new things I guess.  I started so organised today, with all my painted dried pieces of gum paste & some fresh royal icing.  I piped onto my base to mark where I wanted the blades positioned, then started gently putting it together. First the blades didn’t sit up angled enough, then they slid out of place… soon I had royal all over my workbench, all over my pieces, all over me… and just when I started to really lose my cool… the blades started breaking. Back to the drawing board for this little idea. Usually I would pack it up at this point. Because the more I try to do, the more mistakes I make in my frazzled state. But today, I put it aside, and worked on another little part of my project.

Meet Mr Pinchy, Bruce & Dave.. my little crabbie friends! 🙂

So I will leave tonight on a happier note.  For my first go at crabs, I am pretty happy with these little guys. Now to cut my losses, clean up & start fresh tomorrow. Hope you enjoyed the pics & story. Thanks for dropping by! 😀